Angles - Annotated Plan
The Angles tab is used to display set the font, colour and style of the Angles text to be generated for string lines.
To compute the annotated plot, follow these steps:
1. Turn on or off any required options for Lots, areas, bearings, distances etc
2. Press APPLY or OK to generate the annotated text.
Angles
This check box allows the user to turn on or off the Angles.
Note that the Angles text is generated and inserted into the job just like any other piece of text.
It can then be edited and altered at will.
This can also be turned on/off from the ‘Annotated Plot’ tab.
Note: When the lot string is changed the Angles text will NOT be updated.
You must select the Annotated Plan option and re-generate the Angles text.
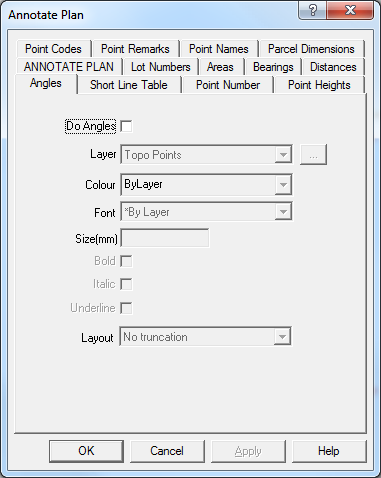
Layer
Select the target layer on which the Angles text will be placed. Press the [...] button to create a new layer.
Note that the Angles text may be generated using the font, text size and colour of the layer it is placed on. This allow you to easily change the size, font or colour of all the angles text by directly changing the layer attributes.
Colour
Select the colour of the Angles text, select ‘*ByLayer’ if you want the angles text to use the same colour as the layer text.
Font
Select the font of the Angles text, select ‘*ByLayer’ if you want the angles text to use the same font as the layer text.
Size
Select the text size in mm for the Angles text, leave this field blank if you want the angles text to use the same text size as the layer text.
Bold
Tick the bock if you want Bold text.
Italic
Tick the box if you want Italic text.
Underline
Tick the box if you want Underlined text.
Layout
Select the truncation option:
- No Truncation - bearings are not truncated at all. (Note: LTO plan bearings may still be rounded)
- Truncate 00”, if the bearing ends in 00”, the 00” will be removed from the text.
- Round to 1min, will round the bearing value to the nearest minute.
- Truncate 00’00”, if the bearing ends in 00’00”, the 00’00” will be removed from the text. e.g. 90 00’00” is truncated to 90. 90°00'00" becomes 90°
90°05'00" becomes 90°5'
90°05'05" becomes 90°5'5"
90°00'05" becomes 90°0'5"
180°00'00" No angle shown